Inhaltsverzeichnis
Dokuwiki and seafile on the Raspberry Pi
Fascinated by the very practical Dokuwiki of Markus, I also started to install my own Dokuwiki. I think that it can be used very well in class - also considering BYOD and Distance Learning.
And as it is, I used a Raspberry Pi (RPi) as a host for it as well…
For the exchange of teaching materials I also set up a seafile instance as cloud storage. This combination of Dokuwiki and seafile seems practical to me.
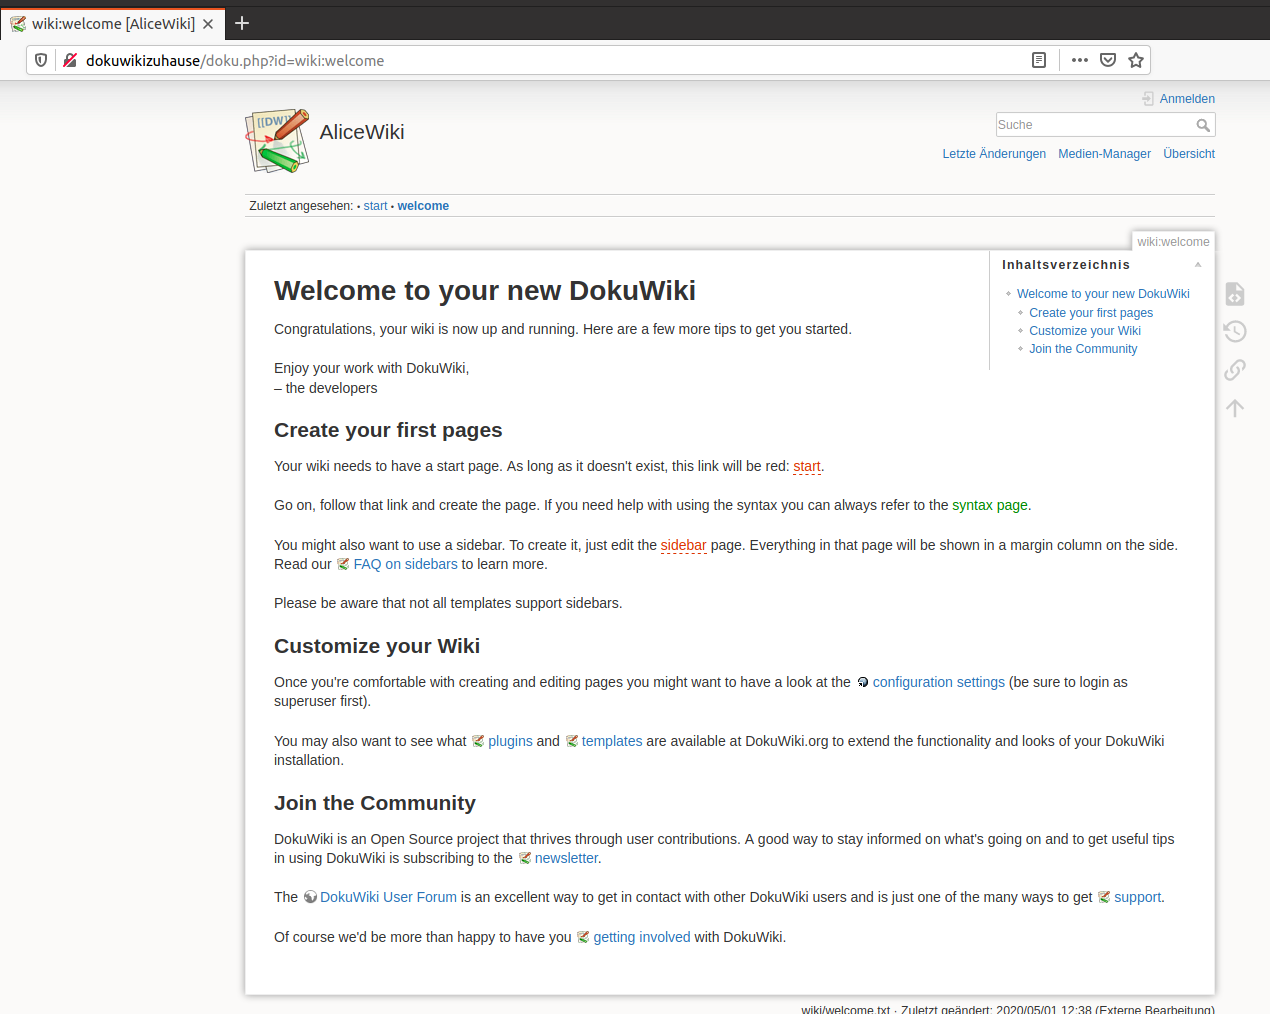
The example of a docuwiki created from this manual is available at https://alicewiki.ddns.net. The example cloud can be found at https://cloudalice.ddns.net (Guest access: Bob with password BobDrBoumaa2020)
This manual is a documentation, a reminder and maybe also an inspiration to install a Dokuwiki+Seafile server in your own house. If you have suggestions or corrections, please leave comments.
Required Hardware
- Raspberry Pi 3 (the installation should work for RPi 4 as well)
- MicroSD card 32GB (possibly with adapter + card reader for computer/notebook)
- 5V power supply (with min. 2.5A)
- Possibly Ethernet cable
- Possibly housing for Raspberry Pi
- Computer/notebook
- Internet (with access to the router)
Install Raspbian
First the microSD card must be flashed with the operating system Raspbian. To do this, the microSD card is connected directly or with a card reader to the PC and formatted.
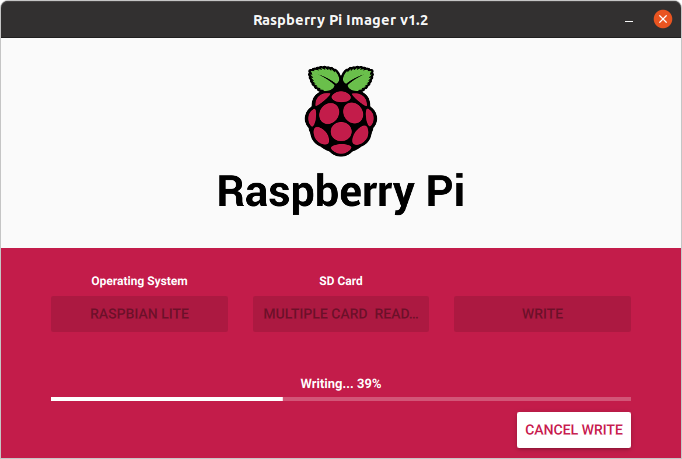 Now you can use the Raspberry Pi Imager to install Raspbian:
- Install Imager.
- Start the Imager.
- Select „Choose OS“ → „Raspbian (other)“ → „Raspbian Lite“.
- Under „Choose SD“, select the microSD card used.
- Press „Write“ to start the writing process.
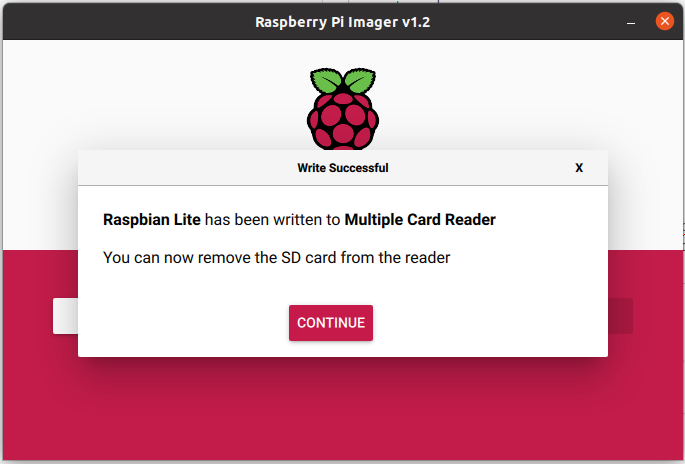
- When complete, click „Continue“, close the Imager, and disconnect the microSD card from the PC.
 To avoid the need of a monitor, mouse and keyboard for the RPi, we have to enable Secure Shell - short SSH - (protocol for communication over the network). Connect the microSD card to the PC again and create a new empty text file on the partition „boot“ of the microSD card. Rename the new file to
 ssh. Important: without file extension .txt. In Windows 10, file extensions can be displayed in the File Explorer via the tab „View“ → „Show/Hide“ → „File name extensions“.
If WIFI is to be used for the Internet connection, an additional file wpa_supplicant.conf with the following content must also be added in the „boot“ partition of the microSD card
country=UK
update_config=1
ctrl_interface=/var/run/wpa_supplicant

network={
 scan_ssid=1
 ssid="NameOfYourWIFI"
 psk="YourWIFIPassword"
}
Now the microSD card can be inserted into the RPi and the RPi can be powered with the power supply. If LAN is to be used for the Internet connection, the RPi must of course be connected to the router via Ethernet cable.
SSH connection with the RPi
To connect to RPi via SSH, we need an SSH client. For Linux, Windows 10 and MacOS this is already integrated in the OS. For older Windows versions PuTTY is very suitable as SSH client.
The RPi has an IP address under which we can reach it in the network. The easiest way to find this IP address is in the router settings: Enter the address 192.168.1.1 in the browser (or depending on the router: 192.168.178.1, 192.168.1.2, 192.168.2.1, Fritz!Box: fritz.box) and read out the IP address of the RPi in the router settings under „Home network“ or „Network“. The RPi should be listed there as a device with the name raspberrypi with the corresponding IP.
Now we can connect to the RPi via SSH (for Windows versions older than Windows 10 see SSH-Windows) :
- Open the terminal.
- Type
ssh pi@192.168.178.20and press enter (adjust IP address). - A password is required. This is:
raspberry - Confirm authentication with
yes. - The connection with the RPi is now active and the terminal prompt should show
pi@raspberrypi:~ $.
Set up Raspbian
Before we install Dokuwiki and seafile, we make the following settings in Raspbian.
Upgrading
- To upgrade the operating system, enter
sudo apt-get update && sudo apt-get upgradeand confirm with Enter. - Inquiry to install the upgrades with
Y - Upgrading takes a while. When finished, the prompt
pi@raspberrypi:~ $appears again.
Change password, user and host name
We should change the default password raspberry for security reasons.
- Enter
sudo raspi-configin the terminal and confirm with Enter. - Select the 1st option „Change User Password“ and change the password by entering it twice. A secure password is mandatory if you want to access RPi over the internet – rather too complicated than too simple
") .
. - Change the hostname with
sudo raspi-configunder „Network Options“ → „Hostname“ (e.g. todokuwikiserver). - Finish the configuration first with
<Back>and then with<Finish>. - Confirm the reboot request with
<Yes>.
Now connect again with SSH to the RPi, but use the new password.
- Create a new username with the command
sudo adduser alice(Alice can be replaced as you like…). - Enter a password twice.
- If desired, enter additional personal data (can also be skipped by pressing Enter).
- Confirm with
Y. - To ensure that the new name has all permissions, we have to assign them with the command
sudo usermod -a -G adm,dialout,cdrom,sudo,audio,video,plugdev,games,users,input,netdev,gpio,i2c,spi alice. - Change to the new name with
sudo su - alice. - End all processes with the user
piwithsudo pkill -u pi. - Now the SSH connection is stopped.
- Connect again via SSH to the RPi, but now with
ssh alice@192.168.178.20(adjust IP address). - With
sudo deluser -remove-home pidelete the userpi.
Change time zone and language
Using sudo raspi-config the time zone, language and keyboard layout can be changed under „Localisation Options“. It is best to restart after changing these settings.
Create a docuwiki server
Install web server software nginx + php
Now we can perform the Dokuwiki installation. We have to connect to the RPi via SSH and install the web server software nginx and php first.
- Update the package list with
sudo apt-get update. - Start the installation of
nginxwithsudo apt-get install nginx -y. - Start the installation of
phpwithsudo apt-get install php php-fpm php-mbstring php-xml php-gd php-sqlite3 php7.3-sqlite -y.
To test if the installations worked, we check them for nginx with the command systemctl status nginx.service. The output in the terminal should look something like this:
● nginx.service - A high performance web server and a reverse proxy server
   Loaded: loaded (/lib/systemd/system/nginx.service; enabled; vendor preset: en
   Active: active (running) since Fri 2020-05-15 01:24:19 CEST; 11h ago
     Docs: man:nginx(8)
 Main PID: 494 (nginx)
    Tasks: 5 (limit: 2200)
   Memory: 11.7M
   CGroup: /system.slice/nginx.service
           ├─494 nginx: master process /usr/sbin/nginx -g daemon on; master_proc
           ├─495 nginx: worker process
           ├─496 nginx: worker process
           ├─497 nginx: worker process
           └─498 nginx: worker process

May 15 01:24:18 dokuwikiserver systemd[1]: Starting A high performance web serve
May 15 01:24:19 dokuwikiserver systemd[1]: Started A high performance web server
For php we use the command systemctl status php7.3-fpm.service. In the terminal the output should look something like this:
● php7.3-fpm.service - The PHP 7.3 FastCGI Process Manager
   Loaded: loaded (/lib/systemd/system/php7.3-fpm.service; enabled; vendor prese
   Active: active (running) since Fri 2020-05-15 12:28:16 CEST; 2min 32s ago
     Docs: man:php-fpm7.3(8)
 Main PID: 9162 (php-fpm7.3)
   Status: "Processes active: 0, idle: 2, Requests: 0, slow: 0, Traffic: 0req/se
    Tasks: 3 (limit: 2200)
   Memory: 5.7M
   CGroup: /system.slice/php7.3-fpm.service
           ├─9162 php-fpm: master process (/etc/php/7.3/fpm/php-fpm.conf)
           ├─9163 php-fpm: pool www
           └─9164 php-fpm: pool www

May 15 12:28:15 dokuwikiserver systemd[1]: Starting The PHP 7.3 FastCGI Process
May 15 12:28:16 dokuwikiserver systemd[1]: Started The PHP 7.3 FastCGI Process M
Install Dokuwiki
Now we have the necessary software to install Dokuwiki.
- Change with
cd /var/wwwto the directory of the webserver. - Download the stable Dokuwiki version using
sudo
  wget https://download.dokuwiki.org/src/dokuwiki/dokuwiki-stable.tgz
. - Unpack the package with
sudo tar xfz dokuwiki-stable.tgz. - Then delete the package with
sudo rm dokuwiki-stable.tgz. - For simplicity, rename the dokuwiki folder:
sudo mv /var/www/dokuwiki-2018-04-22c /var/www/dokuwiki. - Set the permissions for the web server user with
sudo chown -R www-data:www-data /var/www/dokuwiki.
Set up nginx
In order to access the docuwiki, nginx must be configured accordingly. At the moment, Dokuwiki will only be available in the local network. We can choose any domain we want, e.g.: dokuwikizuhause. With the command: sudo nano /etc/nginx/sites-enabled/dokuwikizuhause.conf we create the necessary configuration file. In this file we add the following code (change server_name if another domain is used):
server {
    list 80;
    listen [::]:80;
    server_name dokuwikizuhause;

    root /var/www/dokuwiki;

    location / {
        index doc.php;
        try_files $uri $uri/ @dokuwiki;
    }
    location @dokuwiki {
        rewrite ^/_media/(.*) /lib/exe/fetch.php?media=$1 last;
        rewrite ^/_detail/(.*) /lib/exe/detail.php?media=$1 last;
        rewrite ^/_export/([^/]+)/(.*) /doku.php?do=export_$1&id=$2 last;
        rewrite ^/(.*) /doku.php?id=$1&$args last;
    }

    location ~ \.php$ {
        include fastcgi_params;
        fastcgi_param SCRIPT_FILENAME $document_root$fastcgi_script_name;
        fastcgi_pass unix:/run/php/php7.3-fpm.sock;
    }

    location ~ /(data|conf|bin|inc)/ {
        deny all;
    }
}
The code can be inserted by right-clicking on the terminal → „Insert“. Afterwards save the changes with CTRL+O (maybe different key combination for MacOS or Windows) and close the file with CTRL+X.
The nginx server is restarted with sudo systemctl restart nginx.service.
Reach Dokuwiki on the network
To be able to use the domain dokuwikizuhause we have to adapt the Hosts file on our PC (for MacOS or for Windows). Open the Hosts file and add the line: 192.168.178.20 dokuwikizuhause (adjust IP address).
Dokuwiki is now accessible in the browser at the address http://dokuwikizuhause in your network.
 To finish setting up Dokuwiki, we go to
 http://dokuwikizuhause/install.php and install Dokuwiki according to our wishes.
 After finishing by
 save the installation of Dokuwiki is finished. So we can delete the installation script on the RPi. To do so, connect via SSH and enter the command sudo rm /var/www/dokuwiki/install.php.
That's it! Now Dokuwiki is installed and can be reached in your own network under http://dokuwikizuhause, you can edit and fill it…
To make Dokuwiki accessible from the internet see Internet access.
Create seafile server
Seafile is an OpenSource fileshare server. Although seafile doesn't have as many extension possibilities as nextcloud, but maybe that's also a good thing – considering performance on the RPi.
Install seafile
For the installation we have to connect to the RPi again via SSH.
- First update the package list with
sudo apt-get update. - And install the needed packages for the seafile installation:
sudo apt-get install python2.7 libpython2.7 python-setuptools python-ldap python-mysqldb python-memcache python-urllib3 python-pil python-certifi python-idna python-requests mariadb-server-10.0 sqlite3 -y - For the installation create a user
seafilewith the commandsudo useradd -m -p seafile -s /bin/bash seafile. - Switch to this user with
sudo su seafile. - Change to the main directory of the new user with
cd. - Download seafile with
wget https://github.com/haiwen/seafile-rpi/releases/download/v7.0.5/seafile-server_7.0.5_stable_pi.tar.gz - Unpack the file with
tar xfz seafile-server_7.0.5_stable_pi.tar.gz. - Delete the downloaded package with
rm seafile-server_7.0.5_stable_pi.tar.gz. - Change to the seafile folder:
cd seafile-server-7.0.5 - Start the installation with
./setup-seafile.sh. - Follow the script:
- Select server name e.g.
alicecloud - With the
domain/IPenter the IP address of the RPi192.168.178.20(adjust IP address). - Confirm the directory and port
8082with Enter asdefault. - Press Enter for the seafile installation.
- Finally press Enter again for seahub setup.
Now we can start seafile with the command ./seafile.sh start. Additionally we have to start seahub with the command ./seahub.start and set up the administrator login (we need this data later for the login to seafile). We stop seafile and seahub for further configuration with ./seafile.sh stop and ./seahub.sh stop.
Set up auto-start
To start seafile automatically, we set up an autostart. First, use exit to switch to the main user (in this case alice). Execute the command sudo nano /etc/systemd/system/seafile.service and right-click in the editor to insert the following code:
[Unit]
Description=Seafile
# add mysql.service or postgresql.service depending on your database to the line below
After=network.target

[Service]
Type=forking
ExecStart=/home/seafile/seafile-server-latest/seafile.sh start
ExecStop=/home/seafile/seafile-server-latest/seafile.sh stop
User=seafile
Group=seafile

[Install]
WantedBy=multi-user.target
Save the changes with CTRL+O and CTRL+X and close the editor.
Do the same for seahub. With the command sudo nano /etc/systemd/system/seahub.service open the configuration file and insert this code:
[Unit]
Description=Seafile hub
After=network.target seafile.service

[Service]
Type=forking
# change start to start-fastcgi if you want to run fastcgi
ExecStart=/home/seafile/seafile-server-latest/seahub.sh start
ExecStop=/home/seafile/seafile-server-latest/seahub.sh stop
User=seafile
Group=seafile

[Install]
WantedBy=multi-user.target
Activate the Autostart with sudo systemctl enable seafile seahub. Now we can also control seafile as alice (root user) with sudo systemctl start seafile seahub to start, sudo systemctl stop seafile seahub to stop and sudo systemctl restart seafile seahub to restart.
Set up nginx
In order that the seafile server can also be reached in the network, we still have to set up nginx accordingly.
If not yet installed, this can be done with sudo apt-get install nginx.
Then we create the configuration file for seafile with sudo nano /etc/nginx/sites-enabled/seafile.conf and add the following code (change the server name alicecloud as desired):
server {
    list 80;
    listen [::]:80;
    server_name alicecloud;

    proxy_set_header X-Forwarded-For $remote_addr;

    location / {
         proxy_pass http://127.0.0.1:8000;
         proxy_set_header host $host;
         proxy_set_header X-Real IP $remote_addr;
         proxy_set_header X-Forwarded-For $proxy_add_x_forwarded_for;
         proxy_set_header X-forwarded host $server_name;
         proxy_read_timeout 1200s;


         # used for view/edit office file via Office Online Server
         client_max_body_size 0;

         access_log /var/log/nginx/seahub.access.log
         error_log /var/log/nginx/seahub.error.log
    }

	location /seafhttp {
	rewrite ^/seafhttp(.*)$ $1 break;
	proxy_pass http://127.0.0.1:8082;
	client_max_body_size 0;
	proxy_set_header X-Forwarded-For $proxy_add_x_forwarded_for;

	proxy_connect_timeout 36000s;
	proxy_read_timeout 36000s;
	proxy_send_timeout 36000s;

	send_timeout 36000s;

	access_log /var/log/nginx/seafhttp.access.log
	error_log /var/log/nginx/seafhttp.error.log;
    }
    location /media {
        root /home/seafile/seafile-server-latest/seahub;
    }
}
With sudo rm /etc/nginx/sites-enabled/default and sudo rm /etc/nginx/sites-available/default we delete the default configuration of nginx.
With sudo nginx -t we can test if the configuration works and with sudo nginx -s reload we restart the service nginx. For seafile we also have to make adjustments:
- Switch to the seafile user with
sudo su seafile. - Change to the main directory with
cdand then to the conf folder withcd conf. - There adjust the file ccnet.conf
nano ccnet.conf→ remove:8000so that the line looks like this:SERVICE_URL = http://192.168.178.20(adjust IP). - Save and close with
CTRL+OandCTRL+X. - Open the seahub configuration with
nano seahub_settings.py. - Adjust the line
FILE_SERVER_ROOT = 'http://192.168.178.20/seafhttp'and save and close it withCTRL+OandCTRL+X. - Change to the main user with
exit. - start seafile with
sudo systemctl start seafile seahub
Reach seafile on the network
In order to use the domain alicecloud, we have to adapt the Hosts file on our PC (for MacOS or for Windows). Open the Hosts file and add the line: 192.168.178.20 alicecloud (adjust IP address). Seafile is now accessible in the browser under the address http://alicecloud in your network.
Now we can login to http://alicecloud with the given login data.

With a click on the user avatar under „System Administration“ → „Settings“ adjust the SERVICE_URL on http://alicecloud and FILE_SERVER_ROOT='http://alicecloud/seafhttp' . Important: Confirm the change by clicking on the green tick. 
Ready! Mun we have installed a seafile server on the RPi and can now reach it in the browser in the own network under http://alicecloud.
To make seafile accessible from the internet see Internet access.
Internet access
Up to now the RPi is only accessible via the local network, but to make sure that students or other people can access the server, we still have to set up access via the Internet.
Register domains
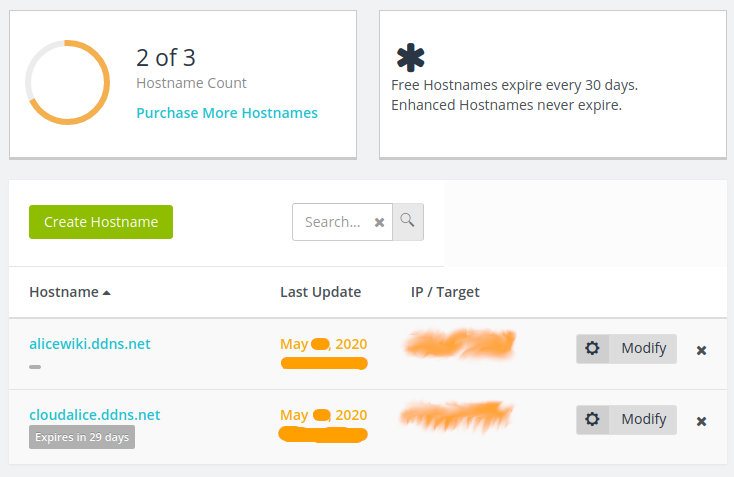 For this we first need two domains, one for the docuwiki and one for the seafile cloud storage. There are several so-called DynDNS providers that allow you to assign a domain to your own network. I have chosen no-IP. There I created an account and registered two domains:
alicewiki.ddns.netfor the Dokuwiki andcloudalice.ddns.netfor the seafile instance.
With no-IP you can register 3 domains for free. However, these have a limited duration and have to be updated once a month in the no-IP account (unless premium is purchased).
Port Forwarding on the router
Now we have to enable port forwarding to the RPi on the router. To do this, enter 192.168.1.1 in the Browser and in the router settings enable the port to the RPi under „Port Forwarding“ (port: 80 for installation, can be deleted afterwards and port 443 permanently).
For a Fritz!Box, the setting is shown in the adjacent picture. 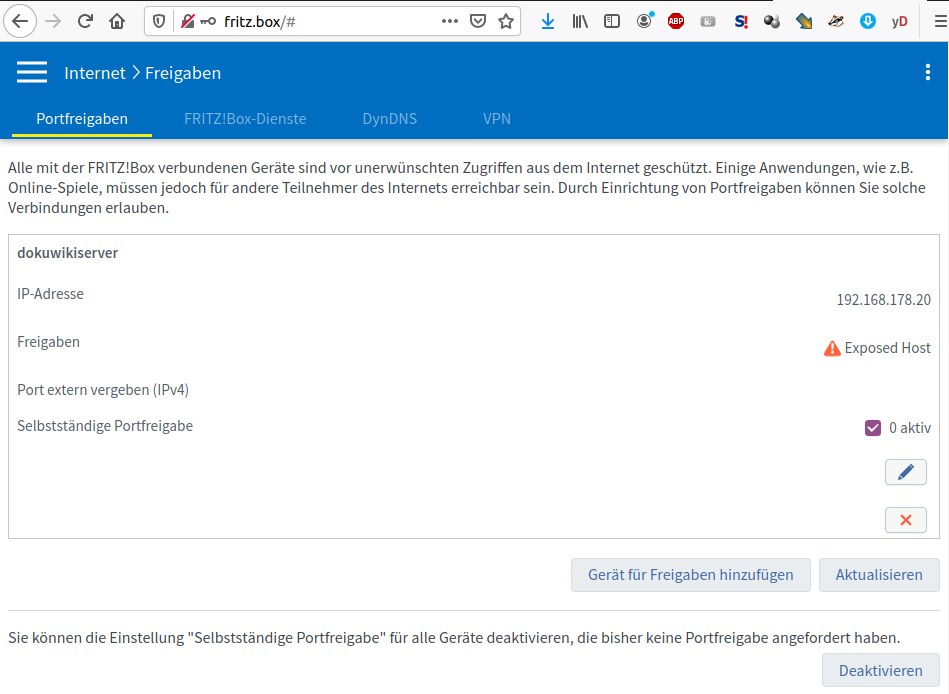 Here only a general forwarding for an IP address can be made without a specific port number. The setting varies depending on the router. Therefore it is best to google for „Port Forwarding on router xy“.
If port forwarding is enabled, we should secure the connection to our server as soon as possible. We do this with the Certbot, which allows a secure connection with https and SSL.
Configure nginx for https (Dokuwiki)
We have to adjust the nginx configuration for the https connection as follows:
- Rename the configuration file:
sudo mv /etc/nginx/sites-enabled/dokuwikizuhause.conf /etc/nginx/sites-enabled/alicewiki.ddns.net.conf(adjust domain name). - Open the configuration file:
sudo nano /etc/nginx/sites-enabled/alicewiki.ddns.net.conf - Change the server name to
alicewiki.ddns.net(adjust domain name). - Save the changes with
CTRL+OandCTRL+Xand close the file. - Now we install certbot, which creates a Let's-Encrypt-Certificate for the secure connection to the server:
sudo apt-get updatesudo apt-get install python-certbot-nginx
nginxconfiguration file:sudo certbot --authenticator standalone --installer nginx -d alicewiki.ddns.net --pre-hook 'service nginx stop' --post-hook 'service nginx start'- During configuration, enter a valid email address to which the message should be sent when the certificate expires.
- Accept the request with
Aand Enter. - No emails for certbot news with
Nand Enter (otherwise withYif desired). - Set up an automatic redirect to the
httpsconnection to the server:2and Enter.
Now the Dokuwiki is available on the Internet at https://alicewiki.ddns.net. If you have problems with the configuration: The configuration file alicewiki.ddns.net.conf should look like this:
server {
    server_name          alicewiki.ddns.net;

    root /var/www/dokuwiki;

    location / {
        index doku.php;
        try_files $uri $uri/ @dokuwiki;
    }
    location @dokuwiki {
        rewrite ^/_media/(.*) /lib/exe/fetch.php?media=$1 last;
        rewrite ^/_detail/(.*) /lib/exe/detail.php?media=$1 last;
        rewrite ^/_export/([^/]+)/(.*) /doku.php?do=export_$1&id=$2 last;
        rewrite ^/(.*) /doku.php?id=$1&$args last;
    }

    location ~ \.php$ {
        include fastcgi_params;
        fastcgi_param SCRIPT_FILENAME $document_root$fastcgi_script_name;
        fastcgi_pass unix:/run/php/php7.3-fpm.sock;
    }

    location ~ /(data|conf|bin|inc)/ {
        deny all;
    }

    listen [::]:443 ssl ipv6only=on; # managed by Certbot
    listen 443 ssl; # managed by Certbot
    ssl_certificate /etc/letsencrypt/live/alicewiki.ddns.net/fullchain.pem; # managed by Certbot
    ssl_certificate_key /etc/letsencrypt/live/alicewiki.ddns.net/privkey.pem; # managed by Certbot
    include /etc/letsencrypt/options-ssl-nginx.conf; # managed by Certbot
    ssl_dhparam /etc/letsencrypt/ssl-dhparams.pem; # managed by Certbot

}
server {
    if ($host = alicewiki.ddns.net) {
        return 301 https://$host$request_uri;
    } # managed by Certbot


    listen               80;
    listen               [::]:80;
    server_name          alicewiki.ddns.net;
    return 404; # managed by Certbot


}
With sudo nginx -t you can check if the configuration of nginx works or if there are any errors.
Configure nginx for https (seafile)
For the seafile server we also have to adjust the nginx configuration for the https connection as follows:
- Rename the configuration file:
sudo mv /etc/nginx/sites-enabled/seafile.conf /etc/nginx/sites-enabled/cloudalice.ddns.net.conf(adjust domain name). - Open the configuration file:
sudo nano /etc/nginx/sites-enabled/cloudalice.ddns.net.conf - Change the server name to
cloudalice.ddns.net. - Use
CTRL+OandCTRL+Xto save the changes and close the file. - Now we install Certbot, which creates a Let's Encrypt certificate for the secure connection to the server.
sudo apt-get update- „sudo apt-get install python-certbot-nginx
nginxconfiguration file:sudo certbot --authenticator standalone --installer nginx -d cloudalice.ddns.net --pre-hook 'service nginx stop' --post-hook 'service nginx start'- During configuration, enter a valid email address to which the message should be sent when the certificate expires.
- Accept the request with
Aand Enter. - No emails for Certbot news with
Nand Enter (otherwise withYif desired). - Set up an automatic forwarding to the
httpsconnection to the server:2and Enter.
- Call the seafile server at
https://cloudalice.ddns.netand log in. - Under „System Administration“ → „Settings“ adjust the
SERVER_URLandFILE_SERVER_ROOTwithhttps://cloudalice.ddns.netandhttp://cloudalice.ddns.net/seafhttprespectively.
Now seafile is available on the internet under https://cloudalice.ddns.net. If you have problems with the configuration file, the configuration file cloudalice.ddns.net.conf should look like this:
server {
    server_name cloudalice.ddns.net;

    proxy_set_header X-Forwarded-For $remote_addr;

    location / {
         proxy_pass http://127.0.0.1:8000;
         proxy_set_header host $host;
         proxy_set_header X-Real IP $remote_addr;
         proxy_set_header X-Forwarded-For $proxy_add_x_forwarded_for;
         proxy_set_header X-forwarded host $server_name;
         proxy_read_timeout 1200s;


         # used for view/edit office file via Office Online Server
         client_max_body_size 0;

         access_log /var/log/nginx/seahub.access.log
         error_log /var/log/nginx/seahub.error.log
    }

	location /seafhttp {
	rewrite ^/seafhttp(.*)$ $1 break;
	proxy_pass http://127.0.0.1:8082;
	client_max_body_size 0;
	proxy_set_header X-Forwarded-For $proxy_add_x_forwarded_for;

	proxy_connect_timeout 36000s;
	proxy_read_timeout 36000s;
	proxy_send_timeout 36000s;

	send_timeout 36000s;

	access_log /var/log/nginx/seafhttp.access.log
	error_log /var/log/nginx/seafhttp.error.log;
    }
    location /media {
        root /home/seafile/seafile-server-latest/seahub;
    }

    listen [::]:443 ssl; # managed by Certbot
    listen 443 ssl; # managed by Certbot
    ssl_certificate /etc/letsencrypt/live/cloudalice.ddns.net/fullchain.pem; # managed by Certbot
    ssl_certificate_key /etc/letsencrypt/live/cloudalice.ddns.net/privkey.pem; # managed by Certbot
    include /etc/letsencrypt/options-ssl-nginx.conf; # managed by Certbot
    ssl_dhparam /etc/letsencrypt/ssl-dhparams.pem; # managed by Certbot

}
server {
    if ($host = cloudalice.ddns.net) {
        return 301 https://$host$request_uri;
    } # managed by Certbot


    list 80;
    listen [::]:80;
    server_name cloudalice.ddns.net
    return 404; # managed by Certbot


}
Increase security
Since RPi is accessible via the Internet, we should still take some security measures.
Always retrieve password
To increase security a little more, we will set that RPi always requires a password when using the command sudo….
To do this, enter sudo nano /etc/sudoers.d/010_pi-nopasswd in the terminal and press Enter to open an editor. There replace the name pi with alice and change NOPASSWD to PASSWD. Save the changes with CTRL+O and close the editor with CTRL+X.
Fail2Ban
To block suspicious connections, there is a useful tool: Fail2Ban. This tool searches for suspicious accesses in the log files created by the RPi and blocks them. It thus protects the RPi from brute-force attacks, for example.
To install, execute the command sudo apt-get install fail2ban -y. Activate the configuration file with the command sudo cp /etc/fail2ban/jail.conf /etc/fail2ban/jail.local and open it with the editor: sudo nano /etc/fail2ban/jail.local.
Scroll to the end of the file with the arrow key or Page-Down and add the following lines
[seafile]
enabled = true
port = http, https
filter = seafile-auth
logpath = /home/seafile/logs/seahub.log
maxretry = 5
With cd /etc/fail2ban/filter.d change to the subfolder filter.d and create a configuration file: sudo nano seafile-auth.conf. Insert the following lines into the file, save and close it:
[INCLUDES]
before = common.conf

[Definition]
daemon = seaf-server
failregex = Login attempt limit reached.*, ip: <HOST>
ignoreregex =
Now restart Fail2Ban with sudo systemctl restart fail2ban and check the status with sudo fail2ban-client status. The output should look like this:
Status
|- Number of jail: 2
`- Jail list: seafile, sshd
Set up firewall
A simple firewall can be installed with the command sudo apt install ufw. So that we can access our server via https and ssh, we allow these accesses with sudo ufw allow ssh and sudo ufw allow 'Nginx Full . With sudo ufw enable we activate the firewall and reboot with sudo reboot.
With sudo ufw status'' the status of the firewall can be queried. This should look something like this:
Status: active

To Action From
-- ------ ----
22/tcp ALLOW Anywhere
Nginx Full ALLOW Anywhere
22/tcp (v6) ALLOW Anywhere (v6)
Nginx Full (v6) ALLOW Anywhere (v6)
To achieve an even higher level of security, password identification can be deactivated and replaced with key authentication to connect to the RPi via SSH (the RPi can then only be reached via SSH with the generated key). See the section „Using key-based authentication“ at Secure Raspberry Pi.
Remarks
- This server is arbitrarily expandable. Possibly seafile could be integrated into Dokuwiki as well…
- A Raspberry Pi 4 with 4GB is probably sufficiently performant – also for several school classes.
- To spare the SD card a bit from to much traffic and to get more storage space (with the above installation there are still 26 GB available), an external hard disk can be used as seafile data storage.